How to mark a simple 8 division on a temari
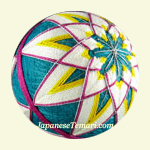
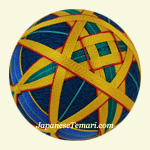
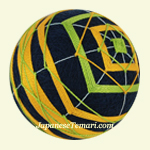
The simple 8 division is one of the most basic ways to divide and mark a temari ball for embroidery. Each ball has a north pole, south pole, and an equator. Divide the equator into 8 sections and you have your simple 8. These are some of the many designs you can stitch on this division.
Download a pdf - Mark a S8 to save the instructions to your computer
Step 1 - Mark the north pole:
Cut a paper strip about 1/4” wide and long enough to go around the ball with an inch or so extra. Fold back about 1/4” and stick a white pin through the crease and straight down into the ball (not at an angle). The white pin marks the north pole (or the top of the ball). Leave the north pole pin in place until you’ve finished stitching the design. This will help you stay oriented.
Step 2 - Cut the paper measuring strip to size:
Wrap the paper strip all the way around the ball, finishing at the north pole pin. Fold the end back on itself so that the fold rests against the metal shaft of the pin. Double check that the length is accurate by releasing the free end, pivoting the strip a quarter turn, and measuring again. Refold if necessary. Pivot and check again. Cut along the fold. With paper still pinned to the ball, fold in half, cut a notch from corner. Repeat twice. Paper strip is now divided into 8 sections.
Step 3 - Mark the south pole:
Refold the paper strip at the center point. Lay it smoothly around the ball and stick a blue pin straight down at the center point along the fold to mark the south pole. Recheck the position several times by pivoting the paper strip around the north pole pin. Keep adjusting the south pole pin until the center point fold touches the shaft of the south pole pin when measured from several different directions.
Step 4 - Mark the equator:
Lay the paper strip down on the ball and stick a red pin straight into the ball at the equator crease line. Pivot the paper around the north pole and place 7 more red pins roughly equal distances around the equator. Then remove the paper strip by carefully snipping from the edge of the strip to the shaft of the north pole pin. Hold the pole pin in place and remove the strip.
Step 5 - Reposition the equator pins:
Next, wrap the paper strip around the equator and use the crease lines to check that the 8 red equator pins are equidistant and they accurately divide the equator into 8 sections. In the drawing above, 3 pins are on the other side of the ball so you can’t see them from this angle.
Step 6 - Anchor the guideline thread:
Thread a needle, leaving the loose end attached to the spool or card of your guideline thread. The pattern directions will tell you what kind of thread to use for the guidelines. Insert the needle at the north pole (white pin) and exit about 2” away. Remove needle from the thread. Tie a knot in the end of the thread and clip the tail short. Bury the knot under the thread wrap by tugging gently on the spool end of the thread.
Step 7 - Wrap the guidelines:
Wrap thread around the ball. Lay the thread right next to the shafts of the pins, in straight lines from pin to pin. Keep thread taut against ball’s surface so it will not slip. Check the thread position at the equator pins to make sure that the thread is always on the same side of the pin. Pivot around the north pole and wrap the thread around the ball towards the south pole again.
Step 8
Continue wrapping around the ball. Pivot each time you get back to the north pole.
Step 9 - Tack the south pole:
When you have completed all the wraps except one, stop at the south pole pin and cut about 30 inches of thread from the spool. Thread the needle and tack the threads crossing the south pole with one or two small stitches. When stitching, always hold the thread securely in place with your thumb.
Step 10 - Tack the north pole:

Continue wrapping the final leg to the north pole. With the same thread, tack the north pole intersection securely in place with small stitches. Leave the north pole pin in place until all the design stitching is finished. Stitch underground and come up at the equator. Wind the guideline thread all the way around the ball at the equator.
Step 11 - Tack the equator intersections:
Tack down the intersections of the guidelines at each of the 8 red pins on the equator. Usually, one diagonal tacking stitch is enough. Stitch underground between intersections if you can’t make it in one stitch. Remove pins as you go.
Step 12
Your temari is now marked in a simple 8 division and is ready for embroidery.