How to make a temari ball
 Want to know the details about making a Japanese temari ball? It's all here - the full story. If you've had trouble making a round ball or had your stitches slip around on a ball, this is where to look for hints and tips for making a well wrapped temari ball that will hold your stitches well.
Please read this all the way through before you begin. The five steps for making your temari are followed by longer explanations.
OR would you rather watch some videos?
Part One - Make a temari ball, first steps
Part Two - Powerwrap a temari ball with thread
Five Steps to Making a Temari Ball (25 cm circumference)
1. Cut a knee high stocking or a sock to hold your filling.
2. Add rice hulls to the stocking. For a temari that is about 25 cm circumference, use 1 cup rice hulls. There are suggestions for other fillings under “Center Core” below. If you prefer to use a Styrofoam ball, you will need a 2½” diameter ball.
3. Make a bell box and insert it into the center of the rice hulls. This step is always optional.
4. Wrap with soft baby yarn until the circumference is about 26 cm.
5. Power wrap with cone thread and then finish wrap with a single strand of thread. Your temari should be about 25 cm circumference. It’s usually fine if your temari is larger by a couple of centimeters. Not smaller though, since the design will be crowded on the ball.
Why use centimeters? Most temari are measured and then divided into sections, like the sections of an orange. When you use the metric system, the math is much easier. Try dividing the equator length into 10 sections. I’ve drawn (and enlarged) a centimeter tape measure to help if you are not familiar with this system. It’s something I had to learn when I first started stitching temari and I’m sure glad I did!
Center core
When I first began making temari, I used a Styrofoam ball as the core, but now after many years of making the entire ball from scratch, I’ve found the “scratch ball” is absolutely my favorite. It is the easiest way to end up with a ball that is round with no lumps and bumps. I think the main reason for this is that everything I use is malleable and the ball can easily be molded into a round shape. Even when you are marking the ball and doing your stitching, you can still adjust the shape.
To make a temari from scratch, begin with an old, clean sock or stocking. One pair of panty hose will go a long way when you cut it into sections. Maybe it’s time to clean out your sock drawer or use those lonely orphan dryer socks for a higher purpose!
Cut a section 6 to 8” long and stitch one end closed with sewing thread; then add filling. The filling should be soft and easy to mold into the shape of a ball. Some good ones are dryer lint, thread and yarn orts (left-over bits), or small scraps of fabric or batting. I think pure batting is too soft. A core made from just fabric is too hard. A combination of the two is just right.
In Japan, rice hulls are a traditional filling that work great! I bought a 50 pound bag from a winery one time. Now I order from Riceland, USA. The only problem with ordering rice hulls is that the shipping costs more than the hulls themselves. You may also be able to find them locally at wine and beer home-brewing stores where they are usually sold by the pound. One pound of hulls is about 16 cups, so you can expect make about 16 temari that are 25 - 27 cm circumference from this amount.
Dried lavender leaves or other herbs in the core make very special temari. In fact, you can add scented oils to your stuffing for more fragrance. Just make sure that whatever the filling, it is clean, dry and free of insects or mold. Scented oils should be placed deep inside the ball so there will be no possibility that they will seep through the layers and come into contact with your stitching on the ball’s surface.
Add a bell box to the center of the core by making a tiny card stock box. Fill the box with jingle bells, beads, rice, small stones or shells. You can also use two bottle caps taped together as a container. If you are planning to give the temari as a gift, consider the recipient when selecting items to enclose in the core. I like to write a wish or prayer on a small slip of paper. Choose small, meaningful items to put in the core so the temari is beautiful inside and out.
It can be very frustrating when your guide pins hit the bell box and won’t stay in the correct place. If you are attempting a division or pattern that is new to you, make the box very small and make sure it is buried in the center of the core. Or, simply leave it out entirely.
Trace the box pattern onto card stock - a recycled greeting card is fine. You could enlarge it if you want. Fold on the dotted lines.
Tape the sides together and fill the box with your selected items. Tape the lid shut. After filling your section of stocking or sock, neatly fold the open end over. There is no need to sew it shut as the first few wraps of yarn in the next step will keep it closed.
Before you wrap - a few words about tension
Tension is a tricky subject. First, relax. Don’t be thinking about the stresses in your life or your temari will turn out like a rock! I’ll try to describe what I mean by the different levels of tension I use when making a ball:
1. Very light tension: used for wrapping yarn around the core. As the yarn flows through your right hand, guide it onto the ball while barely touching it with your hand.
2. Medium tension: used for power wrapping the thread layer. Let the threads flow through your hand, touching all of your curled fingers while applying very light pressure on the thread with your thumb.
3. Snug tension: used for the last, single strand layer of the thread wrap. Let the thread flow through your hand like above, and pull on the thread a bit to increase the tension. If there are dents in the ball, that’s too much pressure!
Using these different levels of tension will help you create a round ball with a snugly wrapped outer surface to hold your stitches and an under-layer of yarn through which your needle can easily pass. You will never need to use pliers to pull the needle through the ball!
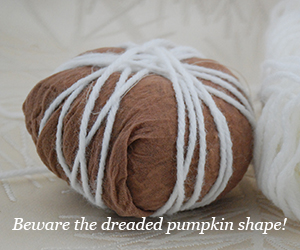
Beware the dreaded pumpkin shape!
Creating a flat pumpkin shaped ball with the yarn running vertically is the most common mistake made by beginners. Try to make your temari round from the very beginning. It’s too hard to fix it later.
Yarn wrap
I highly recommend Jiffy by Lion Brand or Pound of Love by Lion Brand. Both are soft and thick. Other baby yarns work well, too, so long as they are very soft and cushy. By soft, I mean you should compare the skeins of yarn by squeezing them. The best one for temari is the one that compresses the most.
When I’m ready to wrap the temari core with yarn, I’ll walk around in my living room, taking the yarn off the skein. I let the yarn lay on the floor, then I’ll put the skein down and head to the start of the yarn and begin to wrap the ball. The alternative - wrapping directly from the skein - causes you to stop and unwind the yarn from the skein. It also causes uneven tension when you have to pull on the yarn to free it from the skein.
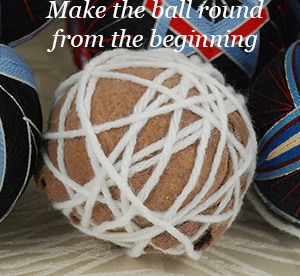
Wrap this first layer with very light, even tension. Wrap randomly by constantly turning the ball. Wrap and turn the ball, wrap and turn the ball, all in one smooth motion. When you see an area where several layers of yarn are piled up and a bump has formed, avoid wrapping over this spot for the next few turns of the ball. Stop two or three times to gently roll the temari around in the palms of your hands with the goal of making the ball round. See a bump? Press it down gently and continue wrapping.
When you are wrapping yarn or thread on the ball, always wrap across the center or fattest part of the ball, not off to one edge. Why? Because the yarn or thread will not slip off the ball when it’s away from the edge. Wrap, turn, wrap, turn. Constantly change direction so that yarn or threads are not lying parallel but are as randomly placed as possible.
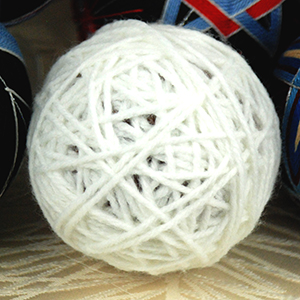
Look carefully at the yarn-wrapped ball when you are done. You should have a round ball and the outer layer should be randomly wrapped so you don’t see a lot of single yarn strands piled up in one place.
Measure the ball now. It should be slightly larger than the finished thread-wrapped size - about 1 cm larger. The thread wrap will compress the ball a bit. If the ball is the size you want, it’s okay if some of the stocking or sock still shows.
Thread wrap
Wrap regular sewing or serger thread over the yarn to create a base for stitching.
When I first taught a group of girls to stitch temari, they were very quickly bored with the slow process of wrapping one single strand of thread around the ball. One of them piped up and asked, “Can we wrap with a lot of threads at once?” The first thing that popped into my mind was “No!” Then, “well, why not try it?” Thank heaven for little girls. They gave a name to this technique of wrapping with several cones of thread at once - power wrapping. I always use it now to quickly cover a yarn ball with thread.
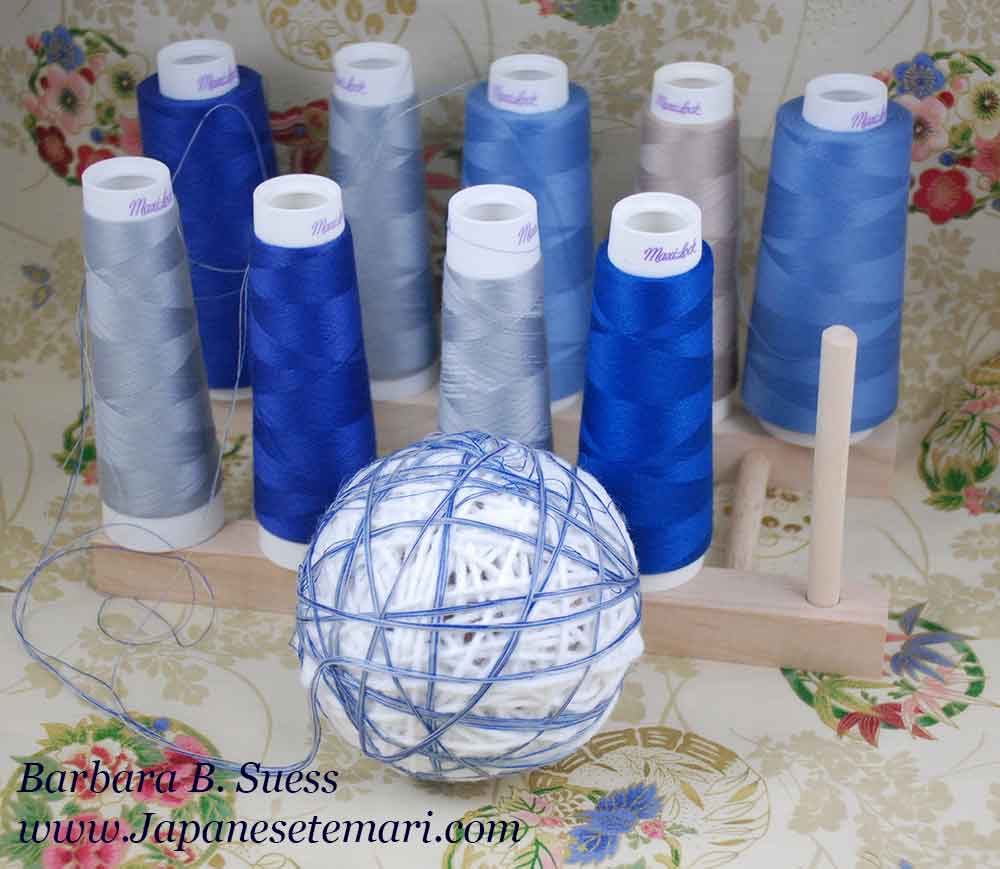
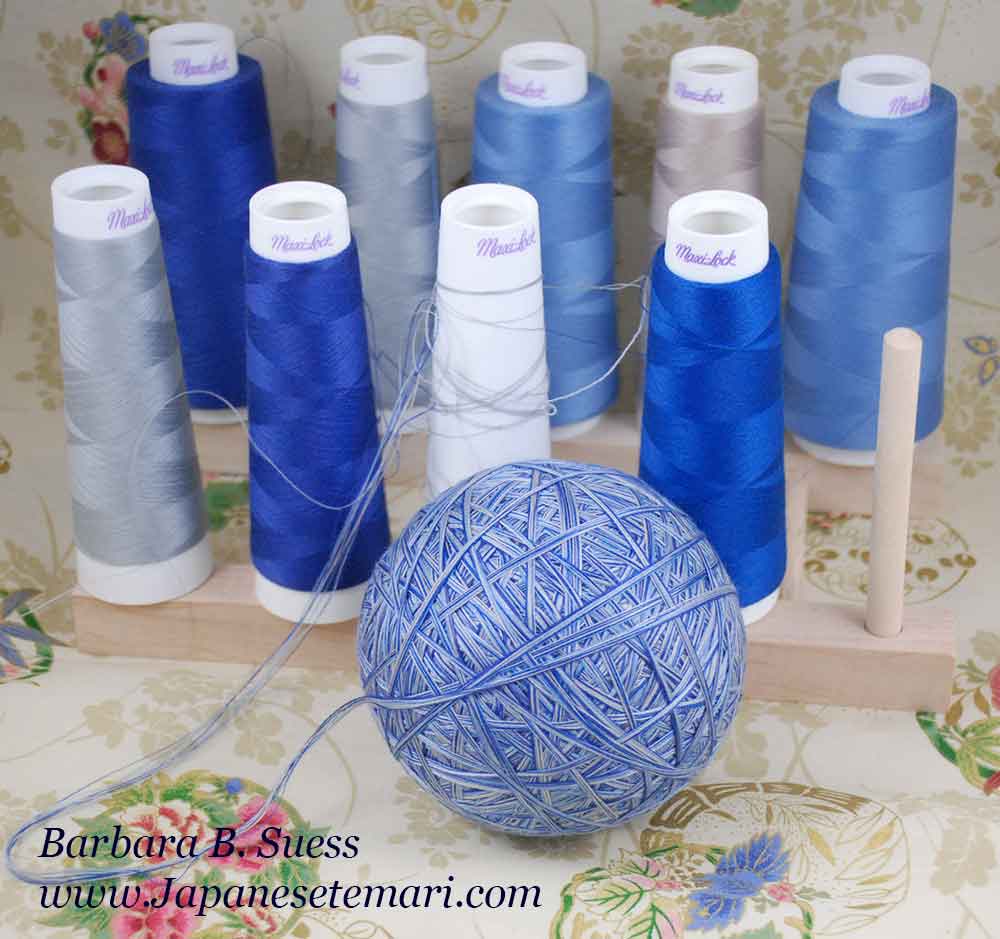
Here’s how its done: sit in a chair and place several cones of serger thread on the floor between your feet. In the pictures below, you'll see that I found a wooden rack to hold my cones. It came from The Container Store. I often use eight cones at once. I really like to wrap quickly with a lot of cones. Use whatever colors you have on hand. Grey blends nicely. Really, you can use any color or combination of colors so long as they are similar in value. Use at least three cones for power wrapping, more if you have them.
Gather up all the ends of the thread on the cones and wrap the ball with all of them at once, holding it directly above the cones of thread. Just like when wrapping with yarn, be sure to wrap randomly so you don’t have the thread piling up in one spot.
Wrap with medium tension. Remember that you want to be able to pass a needle easily through this layer when you are ready to stitch, so don’t wrap too tightly.
When the yarn layer is totally covered and the surface of the ball is feeling rather smooth, cut down on the number of spools so you have just the color for your finished ball.
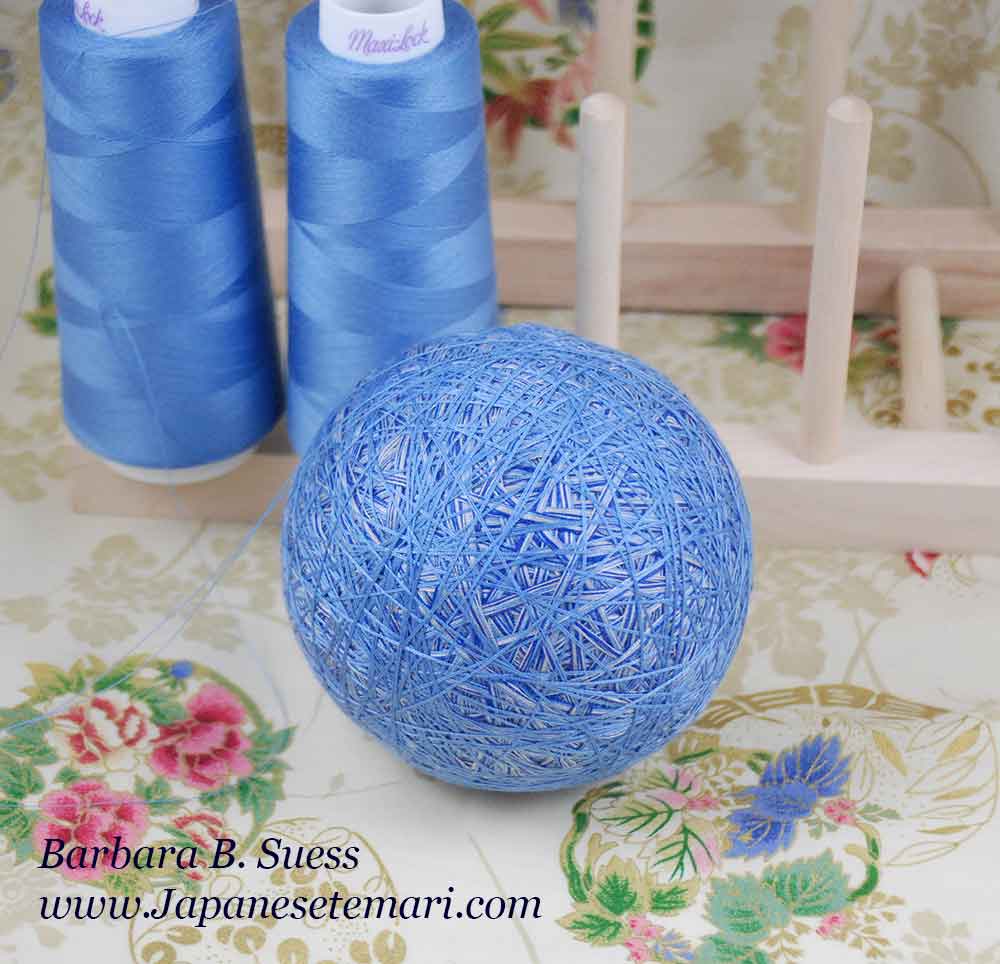
Cut down to one thread. Then when you see that the power-wrapped layer is covered by the single thread layer, it’s time to tighten up on the tension. Cover the ball with one final layer of thread wrapped snugly and randomly. This top layer will hold your stitches so they won’t pull out of their proper place on the ball.

Ending off the thread wrap - End off by cutting thread from spool with a tail about 24” long. Thread a needle with this tail and stitch randomly over the ball’s surface, placing the stitches a couple of inches apart. When you come to the end of your stitching thread, cut the thread even with the ball’s surface. You are ready to add guidelines.
And how do you know if you've made a round ball? You'll find out for sure when you measure it to add guidelines. Good luck. You can do it!